
인프런 '박용주 지식 공유자님' 의 [Next.js 시작하기] 강의를 수강하고 작성한 게시글입니다.
Next.js 시작하기(feat. 지도 서비스 개발) - 인프런 | 강의
Next.js의 기본을 다루는 강의입니다. Next.js로 지도 서비스를 처음부터 끝까지 개발해봅니다., - 강의 소개 | 인프런...
www.inflearn.com
네이버지도 API를 위한 타입 정의 패키지 설치
npm install --save @types/navermaps네이버지도 API 불러오기
▼ components/MapSection.tsx
▽ Map 컴포넌트를 호출
import Map from './Map';

const MapSection = () => {
    return (
        <Map
            onLoad={() => {
                console.log('load!');
            }}
        />
    );
};
export default MapSection;
▼ components/Map.tsx
- ▽ return 문의 Script의 src로 자신의 clientID를 담아 src 호출
import React, { useEffect, useRef } from 'react';
import Script from 'next/script';
import { Coordinates } from '../types/store';
import { NaverMap } from '../types/map';
import { INITIAL_CENTER, INITIAL_ZOOM } from 'hooks/useMap';

type Props = {
    mapId?: string;
    initialCenter?: Coordinates;
    initialZoom?: number;
    onLoad?: (map: NaverMap) => void;
};

const Map = ({
    mapId = 'map',
    initialCenter = INITIAL_CENTER,
    initialZoom = INITIAL_ZOOM,
    onLoad,
}: Props) => {
    const mapRef = useRef<NaverMap | null>(null);

    const initializeMap = () => {
        const mapOptions = {
            center: new window.naver.maps.LatLng(...initialCenter),
            zoom: initialZoom,
            minZoom: 9,
            scaleControl: false,
            mapDataControl: false,
            logoControlOptions: {
                position: naver.maps.Position.BOTTOM_LEFT,
            },
        };

        const map = new window.naver.maps.Map(mapId, mapOptions);
        mapRef.current = map;

        if (onLoad) {
            onLoad(map);
        }
    };

    useEffect(() => {
        return () => {
            mapRef.current?.destroy();
        };
    }, []);

    return (
        <>
            <Script
                strategy="afterInteractive"
                type="text/javascript"
                src={`https://openapi.map.naver.com/openapi/v3/maps.js?ncpClientId=${process.env.NEXT_PUBLIC_NCP_CLIENT_ID}`}
                onReady={initializeMap}
            />
            <div id={mapId} style={{ width: '100%', height: '100%' }} />
        </>
    );
};

export default Map;
▼ types/map.ts
export type NaverMap = naver.maps.Map;▼ types/store.ts
type Lat = number;
type Lng = number;
export type Coordinates = [Lat, Lng];
▼ hooks/useMap.ts
import { Coordinates } from '../types/store';

export const INITIAL_CENTER: Coordinates = [37.5262411, 126.99289439];
export const INITIAL_ZOOM = 10;
매장 데이터 가져오기
▼ public/stores.json
▼ types/store.ts
type Lat = number;
type Lng = number;
export type Coordinates = [Lat, Lng];

export type Menu = { name: string; price: string };
export type Store = {
    nid: number;
    name: string;
    description: string;
    season: number;
    episode: number;
    coordinates: Coordinates;
    images: string[];
    characteristic: string;
    foodKind: string;
    address: string;
    phone: string;
    menus: Menu[];
};
▼ src/pages/index.tsx
- ▽ stores.json 파일을 import 하여 props로 전달
- ▽ revalidate 값을 1시간으로 설정 ( 매장 데이터는 거의 바뀌지 않기 때문에 지정하지 않아도 괜찮음)
- ▽ 나중에 next api routes로 불러올 것임
export const getStaticProps = async () => {
    const stores = (await import('../../public/stores.json')).default;

    return {
        props: { stores },
        revalidate: 60 * 60,
    };
};
SWR
# SWR
- vercel에서 만든 원격데이터 fetch를 위한 커스텀 훅 npm 모듈
- 데이터 가져오기를 위한 React Hooks
# SWR 설치하기
| $ npm i swr |
# mutate
- 언제 데이터를 최신화 할것인지를 컨트롤 할 수 있게 해주는 역할
- const data = mutate(key, data, option)
- 해당 key를 사용하는 useSWR의 캐시를 data로 최신화 시켜준다.
- option 객체를 따로 넘겨주지 않으면 해당 key를 사용하는 useSWR을 revalidate한다.
- mutate로 캐시를 최신화 했다고 해도, 서버의 데이터를 최신화 시키지 않았다면 해당 useSWR이 revalidate되면서 서버에 있는 최신화 이전의 data가 캐시로 갱신된다.
▼ hooks/useStores.ts
import { useCallback } from 'react';
import { mutate } from 'swr';
import { Store } from 'types/store';

export const STORE_KEY = '/stores';
const useStores = () => {
    const initializeStores = useCallback((stores: Store[]) => {
        mutate(STORE_KEY, stores);
    }, []);
    return {
        initializeStores,
    };
};

export default useStores;
▼ src/pages/index.tsx
/* */
   const { initializeStores } = useStores();

    useEffect(() => {
        initializeStores(stores);
    }, [initializeStores, stores]);
/* */
Marker UI 그리기
- map 컴포넌트에서 만든 map을 전역 상태로 공유하여 마커에서도 접근할 수 있도록 해주어야 함 (useSWR)
- 지도가 load 되었을 때 onLoadMap 함수가 실행되면서 map 객체가 전역상태로 저장됨
NAVER Maps API v3
NAVER Maps API v3로 여러분의 지도를 만들어 보세요. 유용한 기술문서와 다양한 예제 코드를 제공합니다.
navermaps.github.io
▼ components/Markers.tsx
- useSWR로 map과 stores 받아온다.
- stores 내 객체들을 하나씩 map 함수로 돌면서 Marker 컴포넌트의 props에 coordinates, icon을 전달하여 호출해 map 위에 marker를 띄운다.
- "markers.png" 는 하나의 png에 여러가지의 marker 이미지가 일렬로 저장되어 있는 파일이다.
- stores의 episode 프로퍼티로 marker 그림을 다르게 띄우도록 한다.
import useSWR from 'swr';
import { STORE_KEY } from 'hooks/useStores';
import { MAP_KEY } from 'hooks/useMap';
import { ImageIcon, NaverMap } from 'types/map';
import { Store } from 'types/store';
import Marker from './Marker';

const Markers = () => {
    const { data: map } = useSWR<NaverMap>(MAP_KEY); //전역 상태로 관리되고 있는 map data 얻기
    const { data: stores } = useSWR<Store[]>(STORE_KEY); // 전역 상태로 관리되고 있는 store data 얻기

    if (!map || !stores) return null;
    // 둘 중 하나라도 없을경우 null 리턴

    return (
        <>
            {stores.map((store) => {
                return (
                    <Marker
                        map={map}
                        coordinates={store.coordinates}
                        icon={generateStoreMarkerIcon(store.episode)}
                        key={store.nid}
                    />
                );
            })}
        </>
    );
};

export default Markers;

const MARKER_HEIGHT = 64;
const MARKER_WIDTH = 54;
const NUMBER_OF_MARKER = 13;
const SCALE = 2 / 3;

const SCALED_MARKER_WIDTH = MARKER_WIDTH * SCALE;
const SCALED_MARKER_HEIGHT = MARKER_HEIGHT * SCALE;

export function generateStoreMarkerIcon(markerIndex: number): ImageIcon {
    /** https://navermaps.github.io/maps.js.ncp/docs/tutorial-8-marker-retina-sprite.example.html */
    return {
        url: 'markers.png',
        size: new naver.maps.Size(SCALED_MARKER_WIDTH, SCALED_MARKER_HEIGHT),
        origin: new naver.maps.Point(SCALED_MARKER_WIDTH * markerIndex, 0),
        scaledSize: new naver.maps.Size(
            SCALED_MARKER_WIDTH * NUMBER_OF_MARKER,
            SCALED_MARKER_HEIGHT
        ),
    };
}
▼ components/Map.ts
/* ... */
export type ImageIcon = {
    url: string;
    size: naver.maps.Size;
    origin: naver.maps.Point; // 스프라이트 이미지에서 클리핑 위치
    scaledSize?: naver.maps.Size;
};
▼ components/Marker.tsx
- map 파일이 변경될 때마다 marker를 지도 위에 띄운다.
- 언마운트 시 setMap에 null을 전달하여 오버레이를 지도에서 제거한다.
import { useEffect } from 'react';
import { Marker } from 'types/map';

const Marker = ({ map, coordinates, icon, onClick }: Marker): null => {
    useEffect(() => {
        let marker: naver.maps.Marker | null = null;
        if (map) {
            marker = new naver.maps.Marker({
                map: map,
                position: new naver.maps.LatLng(...coordinates),
                icon,
            });
        }

        if (onClick) {
            naver.maps.Event.addListener(marker, 'click', onClick);
        }

        return () => {
            marker?.setMap(null);
        };
    }, [map]);

    return null;
};

export default Marker;
▼ components/MapSection.tsx
- useMap의 initalizeMap을 하는 onLoadMap함수를 Map의 onLoad props로 전달하여 Map 컴포넌트를 호출한다
- Markers 컴포넌트를 호출한다.
import useMap from 'hooks/useMap';
import { NaverMap } from 'types/map';
import Markers from './Markers';
import Map from './Map';

const MapSection = () => {
    const { initializeMap } = useMap();

    const onLoadMap = (map: NaverMap) => {
        initializeMap(map);
    };

    return (
        <>
            <Map onLoad={onLoadMap} />
            <Markers />
        </>
    );
};
export default MapSection;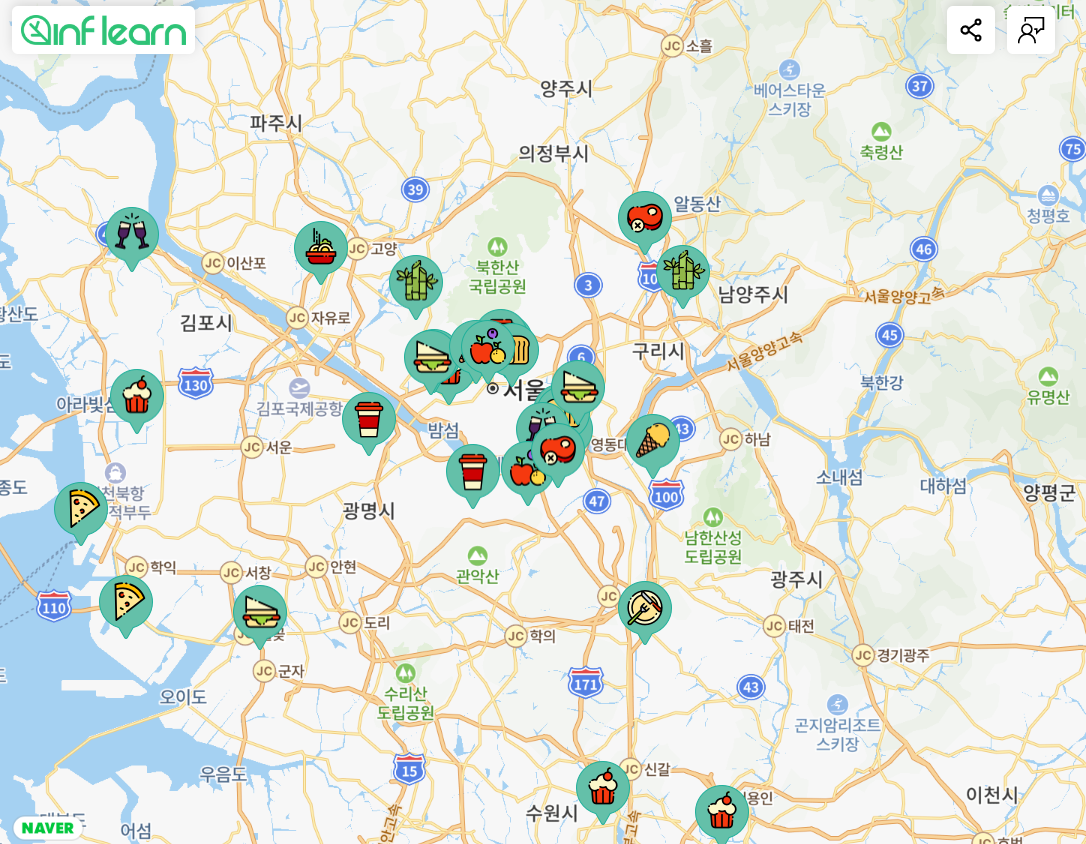
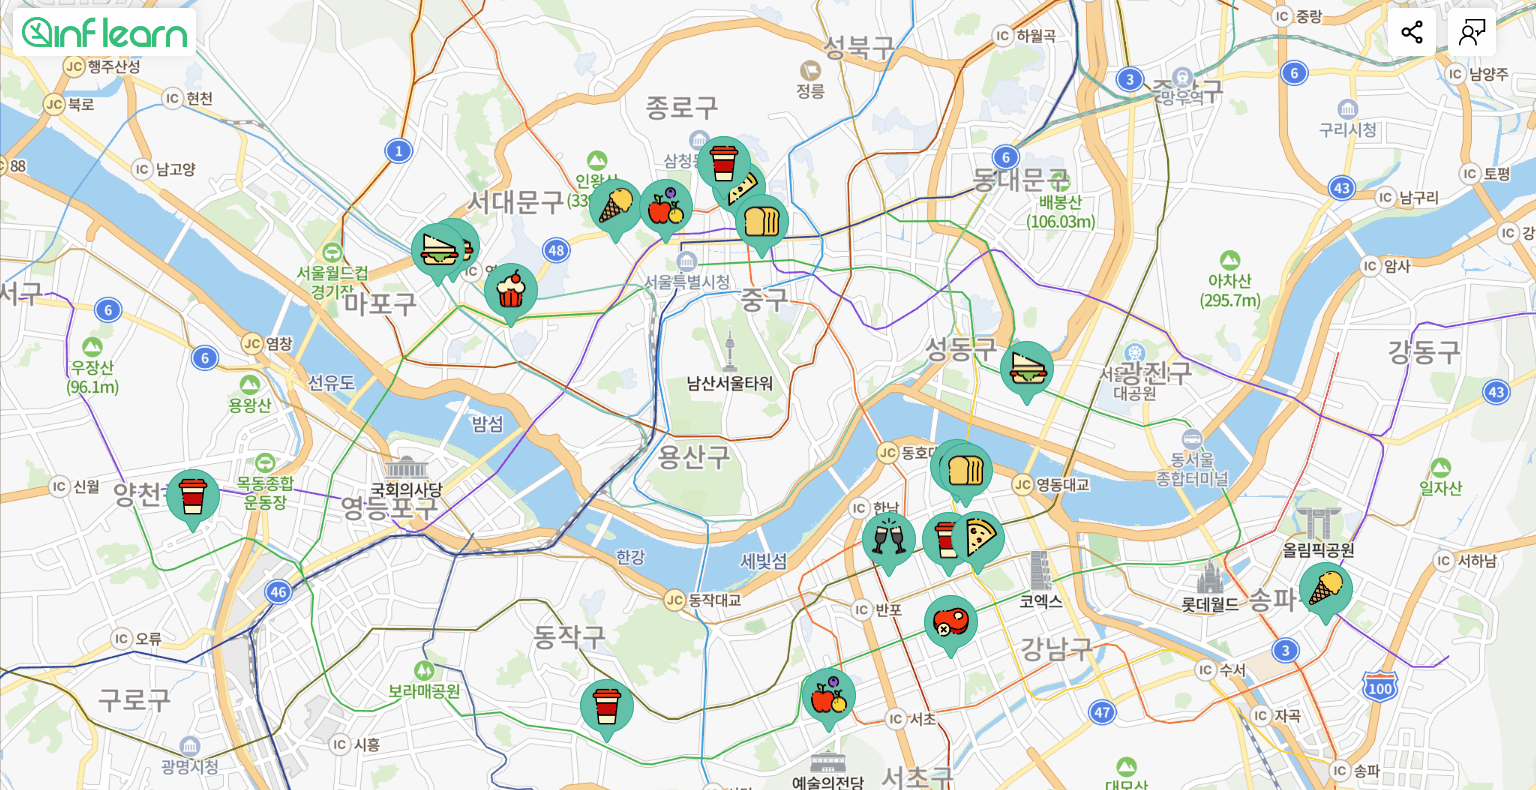
매장 마커 선택 기능 추가하기
- 특정 marker가 클릭되었을 때, 어떤 marker가 클릭되었는지를 currentStore로 전역상태를 관리한다. (custom hook)
- 클릭이 되었을 때 구현되어야 할 기능
1. 해당 마커의 색이 빨간색으로 색이 바뀌어야 한다. (icon 이미지 달라져야 한다.)
2. 해당 마커가 최상단으로 (다른 마커들 위로 ) 올라와야 한다. - boolean 타입의 isSeleted로, 해당 마커가 선택되었는지를 구분짓고, true일 때와 false일 때 다른 icon이 표시되도록 한다.
- 마커가 최상단에 위치하기 위해서 기존의 마커들은 모두 그대로 두고, currentStore(선택된 마커)가 있을 때에만
하나의 마커를 추가로 그린다. - 마커가 없는 빈 곳 눌렀을 때는 currentStore가 지워지도록 map 자체에 click 이벤트를 추가한다.
▼ hooks/useCurrentStore.ts
- 현재 선택된 마커를 전역 상태로 관리하기 위한 custom hook이다.
- setCurrentStore함수는 SWR의 '/current-store'에 현재 선택된 store를 저장한다.
- clearCurrentStore 함수는 SWR의 '/current-store'에 null을 저장해 현재 선택된 마커가 없도록 한다.
import { useCallback } from 'react';
import { mutate } from 'swr';
import { Store } from 'types/store';

export const CURRENT_STORE_KEY = '/current-store';

const useCurrentStore = () => {
    const setCurrentStore = useCallback((store: Store) => {
        mutate(CURRENT_STORE_KEY, store);
    }, []);

    const clearCurrentStore = useCallback(() => {
        mutate(CURRENT_STORE_KEY, null);
    }, []);

    return {
        setCurrentStore,
        clearCurrentStore,
    };
};

export default useCurrentStore;
▼ components/Markers.tsx
- useSWR로 currentStore을 가져온다.
- useCurrentStore에서 setCurrentStore과 clearCurrentStore을 가져온다.
- generateStoreMarkerIcon 함수에서 isSeleted 변수를 추가하고, true이면 'markers-seleted.png'에서 icon을 가져오고, false이면 'markers.png'에서 icon을 가져온다.
'markers-seleted.png'은 기본 이미지에서 배경이 빨간색인 이미지이다. - map 함수로 store 하나하나씩 Marker 컴포넌트를 호출하고, onClick 함수로 현재 클릭된 마커가 currentStore로 저장되도록 setCurrentStore함수를 전달한다.
- 현재 선택된 마커가 있다면, (currentStore가 있다면) 해당 마커만 추가로 표시한다. (빨간색 배경 이미지로)
- 선택된 마커를 다시 클릭하면 선택 취소가 되어, 빨간색 배경 마커가 사라지도록 한다.
/* . . . */
    const { data: currentStore } = useSWR<Store>(CURRENT_STORE_KEY);
    const { setCurrentStore, clearCurrentStore } = useCurrentStore();
/* . . . */
url: isSeleted ? 'markers-selected.png' : 'markers.png',/* . . . */
{stores.map((store) => {
return (
<Marker
map={map}
coordinates={store.coordinates}
icon={generateStoreMarkerIcon(store.episode, false)}
onClick={() => {
setCurrentStore(store);
}}
key={store.nid}
/>
);
})} {currentStore && (
<Marker
map={map}
coordinates={currentStore.coordinates}
icon={generateStoreMarkerIcon(currentStore.episode, true)}
onClick={clearCurrentStore}
key={currentStore.nid}
/>
)}
/* . . . */
▼ components/MapSection.tsx
- 마커가 없는 map 부분을 클릭했을 때 현재 선택된 마커가 클릭 취소되도록 해야한다.
- onLoadMap 함수에 map에 클릭 이벤트 listener를 등록하는데, 클릭되었을 때, currentStore가 null이 되도록 하는 함수 clearCurrentStore를 전달한다.
/* . . . */
    const onLoadMap = (map: NaverMap) => {
        initializeMap(map);
        naver.maps.Event.addListener(map, 'click', clearCurrentStore);
    };

    return (
        <>
            <Map onLoad={onLoadMap} />
            <Markers />
        </>
    );
/* . . . */
지도 URL 공유 기능 구현하기
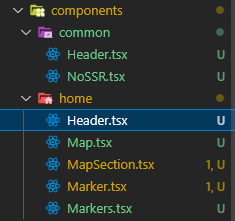
헤더 분리
- 헤더 컴포넌트는 components/common
- 홈 화면의 헤더 컴포넌트는 components/Header
▼ hooks/useMap.ts
- resetMapOptions 함수는 초기 설정했던 좌표와 zoom 값으로 초기화해주는 함수이다.
- getMapOptions 함수는 현재 map의 center 값의 좌표와 zoom 값을 리턴해주는 함수이다.
    const { data: map } = useSWR(MAP_KEY);

    const initializeMap = useCallback((map: NaverMap) => {
        mutate(MAP_KEY, map);
    }, []);

    const resetMapOptions = useCallback(() => {
        map.morph(new naver.maps.LatLng(...INITIAL_CENTER), INITIAL_ZOOM);
    }, [map]);

    const getMapOptions = useCallback(() => {
        const mapCenter = map.getCenter();
        const center: Coordinates = [mapCenter.lat(), mapCenter.lng()];
        const zoom = map.getZoom();
        return { center, zoom };
    }, [map]);

    return {
        initializeMap,
        resetMapOptions,
        getMapOptions,
    };
};
# morph
morph(coord, zoom, transitionOptions)
지정한 좌표와 줌 레벨을 사용하는 새로운 위치로 지도를 이동합니다. 이때, 이동 거리가 가깝다면 부드럽게 이동합니다.
Parameters
NameTypeArgumentDescription
| coord | Coord | CoordLiteral | 이동할 중심 좌표 | |
| zoom | number | <optional> | 이동할 줌 레벨 |
| transitionOptions | TransitionOptions | <optional> | 이동 효과에 사용할 옵션 |
- 클립보드에 링크를 복사하는 기능을 구현하기 위해서는 copy-to-clipboard를 사용해야한다.
| $ npm i copy-to-clipboard |
▼ components/home/header.tsx
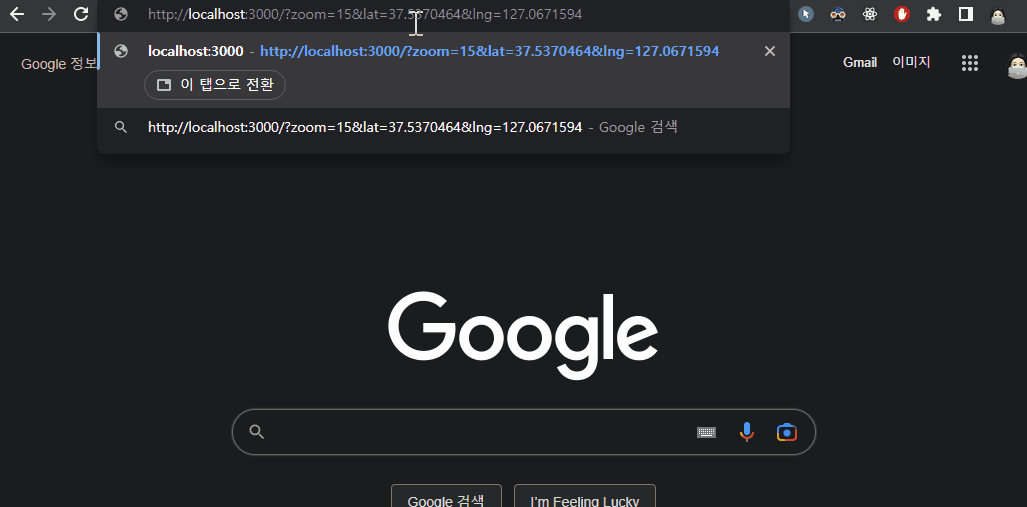
- replaceAndCopyUrl 함수는 현재 좌표와 zoom 값으로 URL 쿼리 만들어 현재 링크를 해당 URL로 라우팅하고, 클립보드에 location.origin+해당 쿼리 를 복사한다.
- 개발자 모드에서의 location.origin : http://localhost:3000
- replaceAndCopyUrl 함수를 공유 버튼의 onClick 함수로 사용한다.

///
import { useRouter } from 'next/router';
import { useCallback } from 'react';
import copy from 'copy-to-clipboard';

const HomeHeader = () => {
    const { resetMapOptions, getMapOptions } = useMap();

    const router = useRouter();
    const replaceAndCopyUrl = useCallback(() => {
        const mapOptions = getMapOptions();
        const query = `/?zoom=${mapOptions.zoom}&lat=${mapOptions.center[0]}&lng=${mapOptions.center[1]}`;
        router.replace(query);
        copy(location.origin + query);
    }, [router, getMapOptions]);
///
▼ components/home/MapSection.tsx
- replaceAndCopyUrl 함수에서 만든 url 쿼리를 브라우저에서 접속했을 때 해당 위치로 이동하는 기능을 구현해야 한다.
- qurey 함수는 현재 URL을 리턴해준다.
- ex) router.asPath.slice(1) => ?zoom=12&lat=37.6583161&lng=127.1630108
- initialZoom은 query에서 zoom 값을 가져와 리턴한다. 만약 없으면 초기 생성한 INITAL_ZOOM 값인 10이 리턴된다.
- initialCenter은 query에서 lat 값과 lng 값을 가져와 좌표 형식을 리턴한다. 만약 없으면 초기 생성한 INITIAL_CENTER가 리턴된다.
- Map을 리턴할 때, initialCenter와 initialZoom 값을 props로 전달하면, url에 zoom 또는 center 값이 있을 때 해당 위치로 이동한 지도를 보여준다.
///
import { useRouter } from 'next/router';
import { useMemo } from 'react';
import { Coordinates } from '@/types/store';

const MapSection = () => {
    const router = useRouter();

    const query = useMemo(() => {
        return new URLSearchParams(router.asPath.slice(1));
    }, []);

    const initialZoom = useMemo(() => {
        return query.get('zoom') ? Number(query.get('zoom')) : INITIAL_ZOOM;
    }, [query]);

    const initialCenter = useMemo<Coordinates>(() => {
        return query.get('lat') && query.get('lng')
            ? [Number(query.get('lat')), Number(query.get('lng'))]
            : INITIAL_CENTER;
    }, [query]);
///

            <Map
                onLoad={onLoadMap}
                initialCenter={initialCenter}
                initialZoom={initialZoom}
            />
            <Markers />
///
▼ components/common/Header.tsx
- 로고 클릭했을 때 초기값으로 설정한 center와 zoom값으로 바뀌도록 한다.
- Header 컴포넌트에 로고에 onClick 함수로 onClickLogo 함수를 넣고, prop로 받도록한다.
///
const HeaderComponent = ({ onClickLogo, rightElements }: Props) => {
    return (
        <header className={styles.header}>
            <div className={styles.flexItem}>
                <Link href="/" className={styles.box} onClick={onClickLogo}>
                    <Image
                        src="/inflearn.png"
                        width={110}
                        height={20}
                        alt="인프런 로고"
                    />
                </Link>
///
▼ components/home/Header.tsx
- Home의 Header 컴포넌트에서 onClickLogo 함수로 resetMapOptions 함수를 넘겨준다.
///
           <Header
                onClickLogo={resetMapOptions}
///
