
monogoDB와 express를 연동하고 테스트하기 위해 간단하게 유저리스트를 보여주고, 새 유저를 등록하고, 특정 유저를 삭제하고, 모든 유저를 삭제하는 실습을 할 것이다. (+ejs)
MongoDB Database 생성
Cloud: MongoDB Cloud
account.mongodb.com
먼저, 위 사이트에 접속하여 MongoDB 를 생성해야 한다.
1. new Project 생성

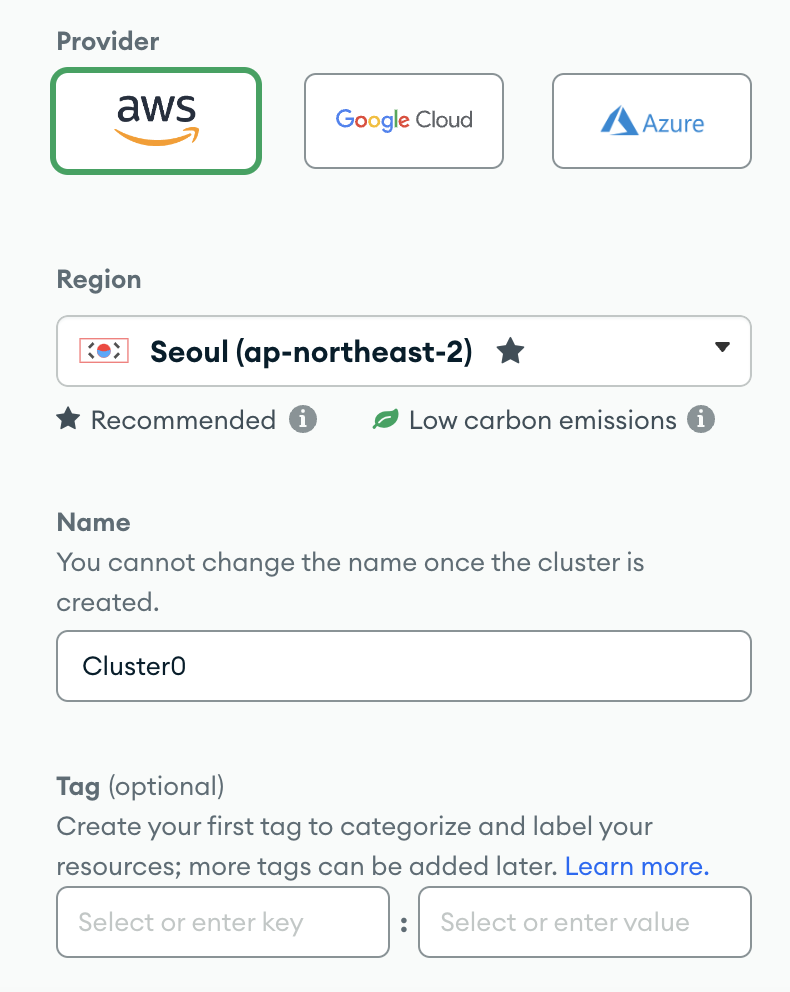
2. create a depolyment
- M0 버전으로(무료)
- provider는 AWS (다른 것도 상관없음)
- 지역 Seoul
- Name 지정 후 create 버튼
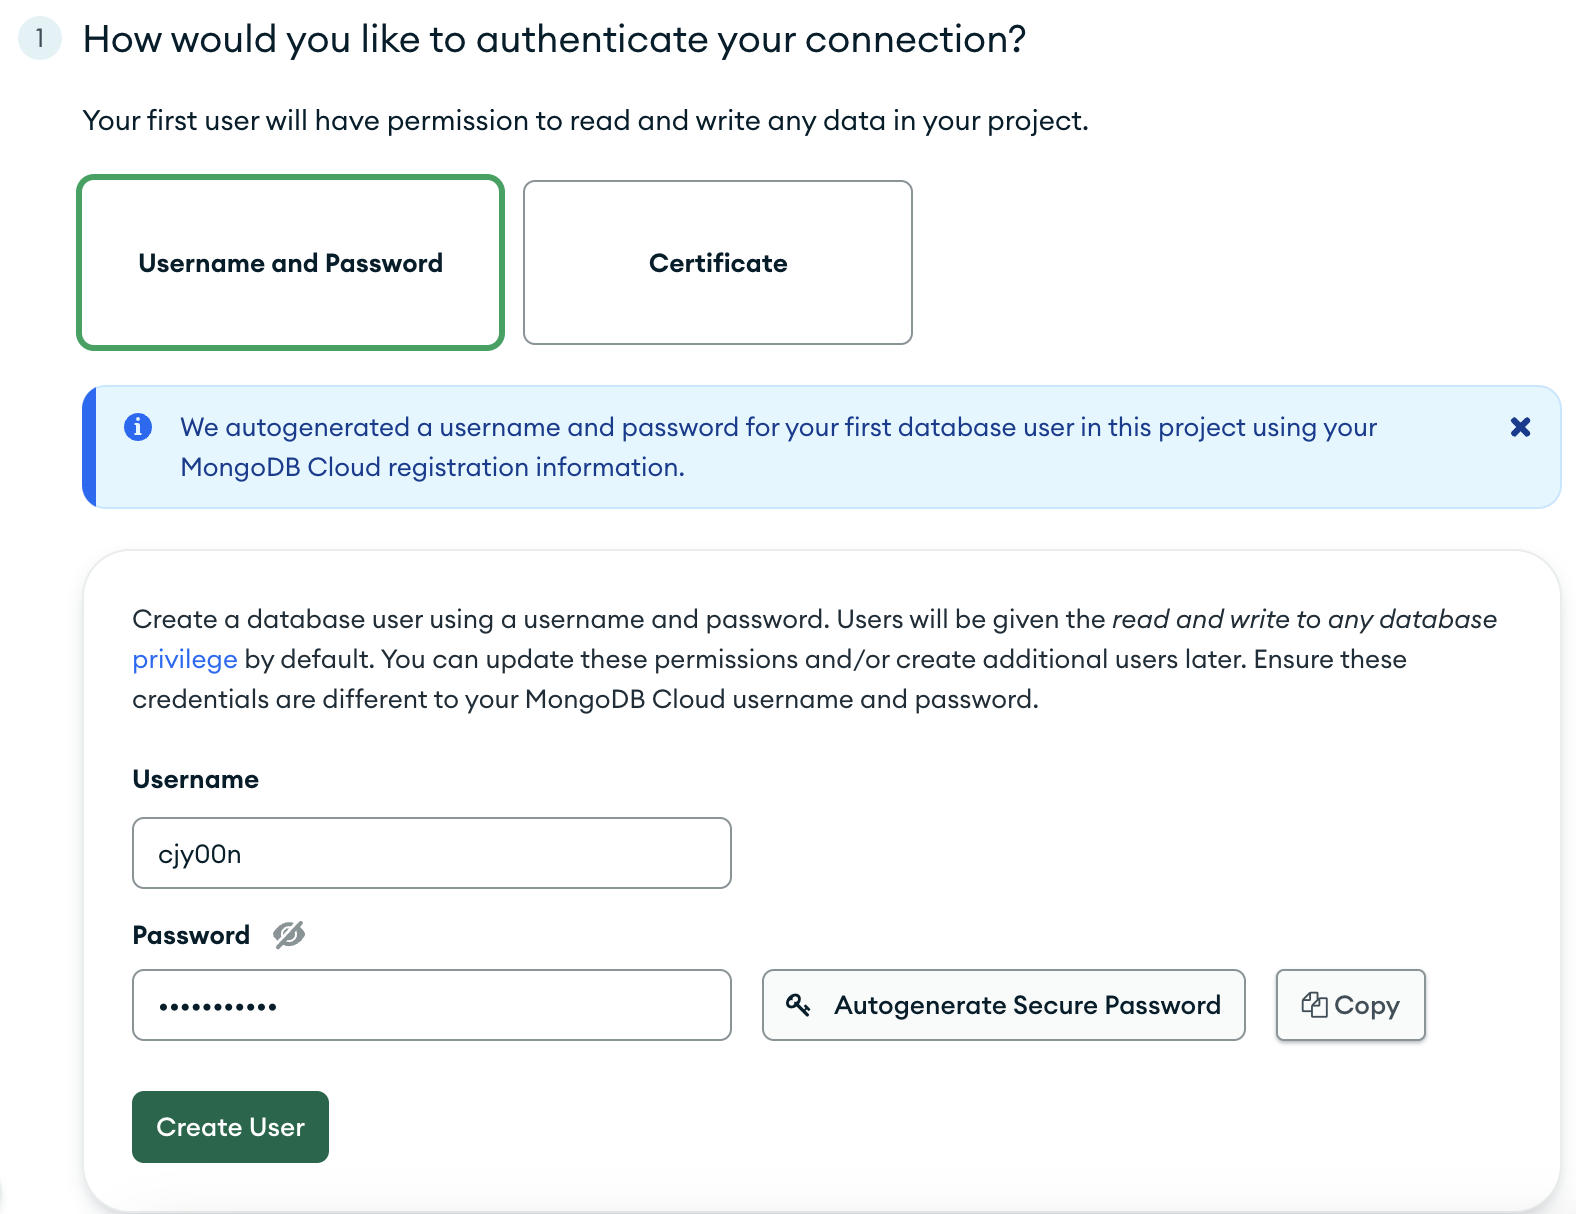
3. userName과 password 지정(password 기억 꼭하기 !) 하고 create User
4. Add My Current IP Adress 버튼 클릭하면 하단에 나의 IP 주소 추가됨
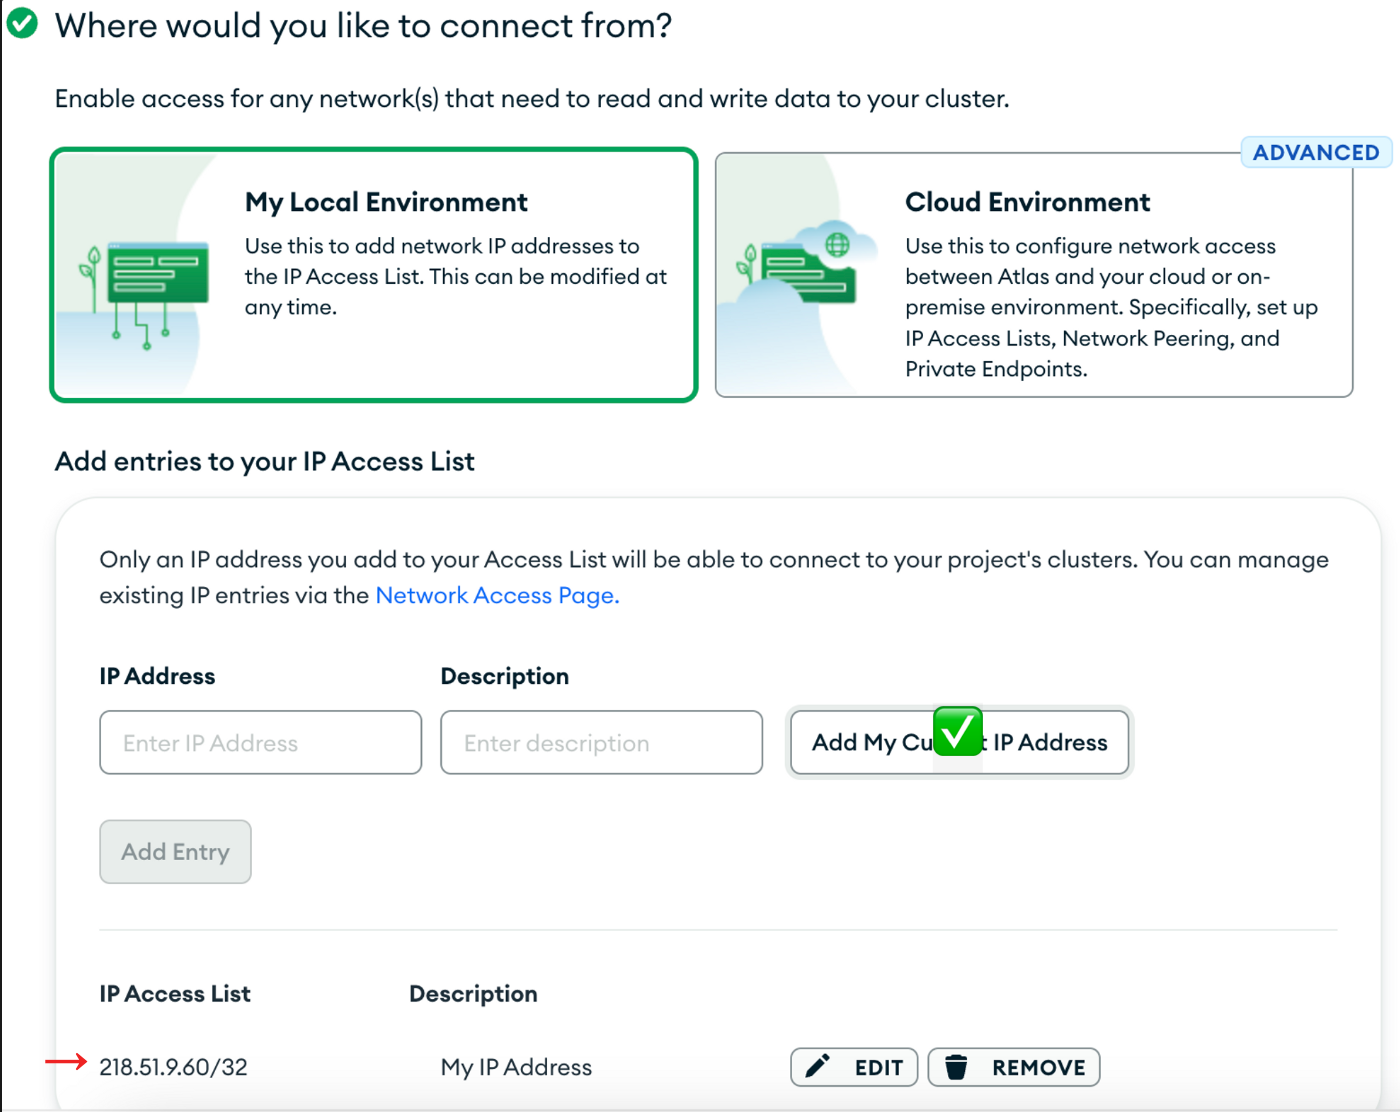
5. Finish and Close
프로젝트 생성하기
1. vscode로 빈 디렉토리 생성 ( 나는 mongotest 라고 했다.)
2. 프로젝트 생성 ( 물어보는 모든 질문 enter 연타)
npm init3. 필요한 라이브러리 설치 (express, mongoose, ejs, dotenv )
npm install express mongoose ejs dotenv
프로젝트 시작하기
루트 디렉토리 경로에
- server.js 파일 생성
- .env 파일 생성
- models 디렉토리 생성
- router 디렉토리 생성
- views 디렉토리 생성
▼ ./.env
- mongoDB에 접근하기 위해 위에서 정의헀던 username과 pw 값을 넣어준다.
- 실행할 포트 번호를 넣어준다.
- 이 파일은 깃허브 등에 올릴 때 .gitignore로 가린 채 올려야한다.
// 위에서 생성한 user의 username과 pw 입력
MONGO_USER = username
MONGO_PASS = password

PORT = 3000
server.js
가장 먼저 해야 할 4가지는
- express 라이브러리 import
- mongoose 라이브러리 import
- dotenv 설정
- app.use 세팅하기
require("dotenv").config();
const express = require("express");
const mongoose = require("mongoose");
const app = express();
const { MONGO_USER, MONGO_PASS, PORT } = process.env;

app.use(express.json());
app.use(express.urlencoded({ extended: true }));
mongoDB 연결
mongoose.connect() 함수로 mongoDB와 연결한다.
// mongoDB 연결하기
mongoose
.connect(
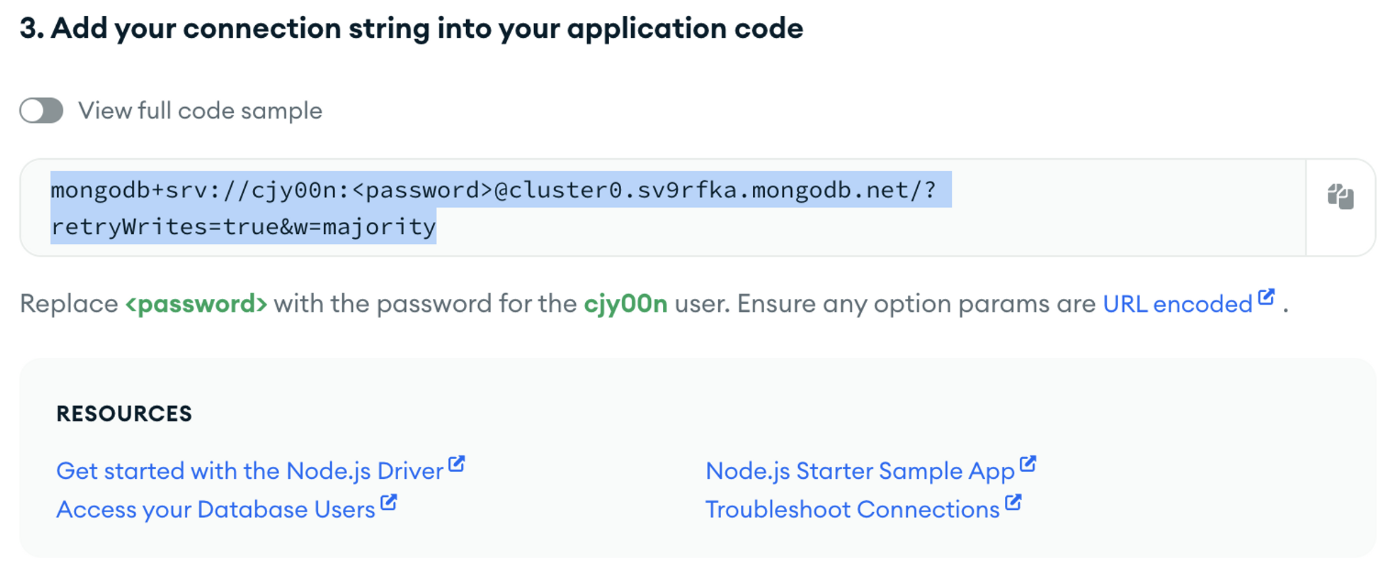
`mongodb+srv://${MONGO_USER}:${MONGO_PASS}@cluster0.sv9rfka.mongodb.net/?retryWrites=true&w=majority`
)
.then(() => {
console.log("Connnected to MongoDB Database");
})
.catch((err) => {
console.log(err);
});위에서 연결 시 사용한 링크는
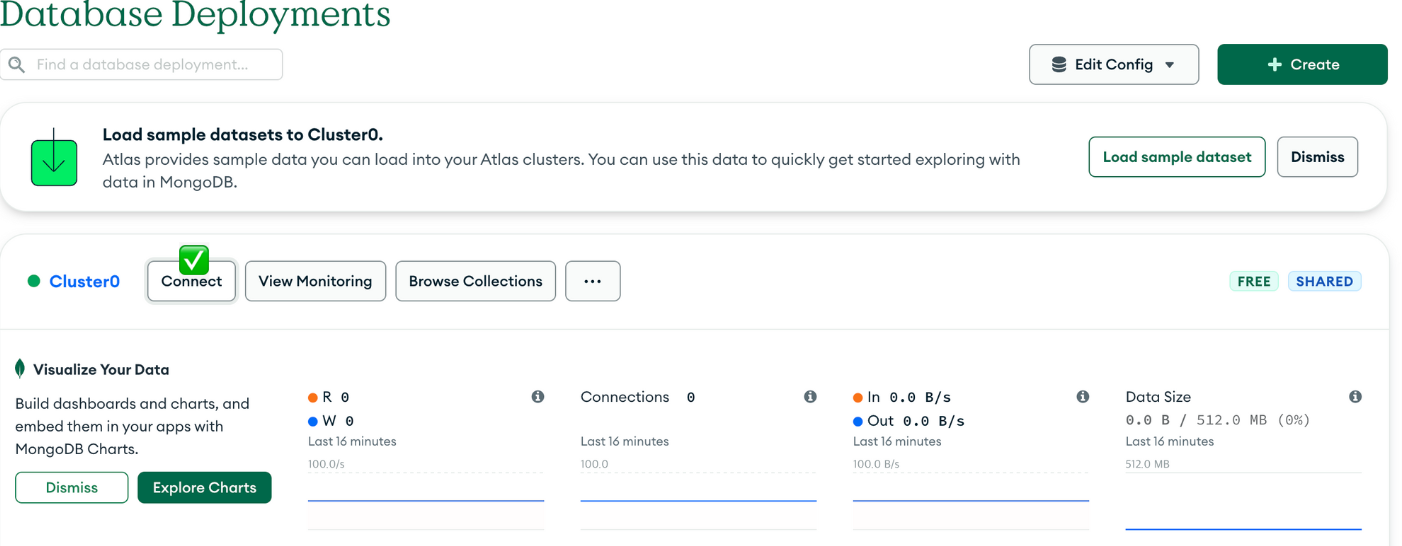
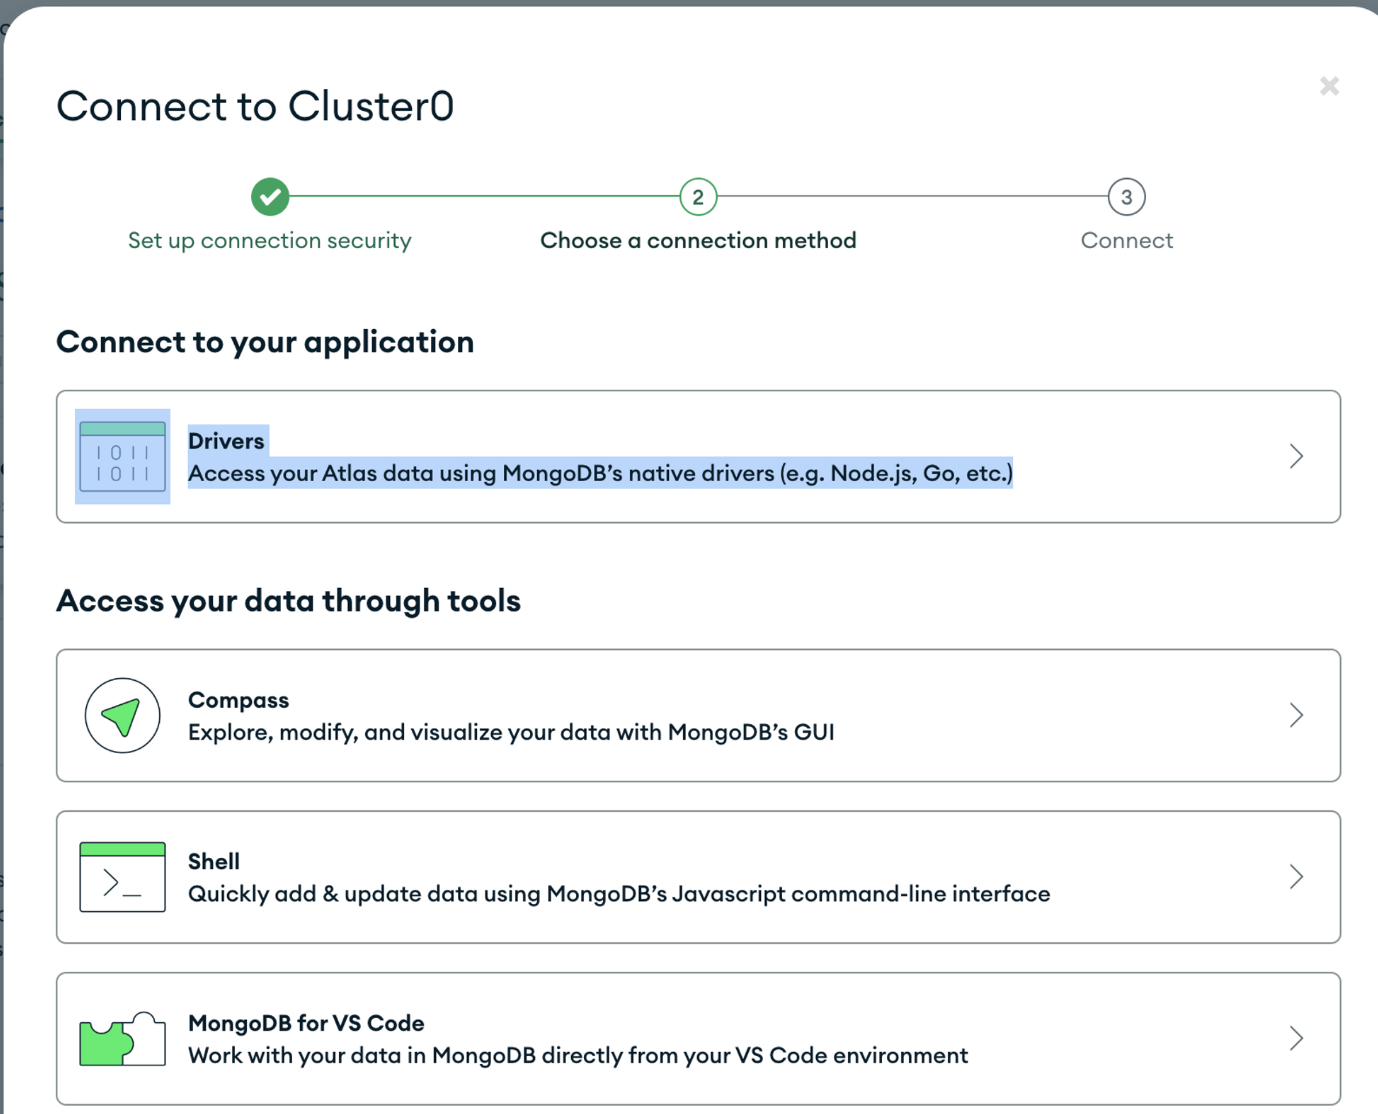
mongodb atlas에 다시 접속하여 아래와 같이
connect 버튼 클릭 후 -> Driver 클릭 -> 링크 복사 로 가져올 수 있다.
DB 연결 확인
DB가 잘 연결되었는 지 확인하려면 터미널에 server를 실행시킨다.
node server.js
ejs 사용하기
ejs란 ?
-> JS가 내장되어 있는 HTML 파일로서, 템플린 엔진이다. 현업에서는 잘 사용하지 않는다.
ejs를 사용하기 위해 server.js에 아래와 같이 세팅한다.
app.set("view engine", "ejs");
app.set("views", __dirname + "/views");
ejs파일은 views/index.ejs 에 설정한다.
<head>
<head>
<meta charset="UTF-8" />
<meta http-equiv="X-UA-Compatible" content="IE=edge" />
<meta name="viewport" content="width=device-width, initial-scale=1.0" />
<link href="https://cdn.jsdelivr.net/npm/bootstrap@5.1.3/dist/css/bootstrap.min.css" rel="stylesheet" integrity="sha384-1BmE4kWBq78iYhFldvKuhfTAU6auU8tT94WrHftjDbrCEXSU1oBoqyl2QvZ6jIW3" crossorigin="anonymous" />
<title>Document</title>
</head>
</head>
<body>
<div class="m-5">
<h1>Make user</h1>
<div class="mb-3">
<label for="exampleInputEmail1" class="form-label">Username</label>
<input type="username" class="form-control" id="usernameInput" aria-describedby="emailHelp" />
</div>
<div class="mb-3">
<label for="exampleInputPassword1" class="form-label">Password</label>
<input type="password" class="form-control" id="passwordInput" />
</div>
<button class="btn btn-primary" onclick="makeUser()">Submit</button>
<div>
<table class="table mt-5" style="font-size: 13px;">
<thead>
<tr>
<th>Username</th>
<th>Password</th>
</tr>
</thead>
<tbody id="users">
<% for(var i=0; i<users.length; i++) {%>
<tr>
<td><%= users[i].username %></td>
<td><%= users[i].password %></td>
<td><button class="btn btn-danger" onclick="deleteUser('<%= users[i]._id %>')">Delete</button></td>
</tr>
<% } %>
</tbody>
</table>
<button class="mt-5 btn btn-primary" onclick="deleteAll()">Delete All</button>
</div>
</div>
<script src="https://cdn.jsdelivr.net/npm/bootstrap@5.1.3/dist/js/bootstrap.bundle.min.js" integrity="sha384-ka7Sk0Gln4gmtz2MlQnikT1wXgYsOg+OMhuP+IlRH9sENBO0LRn5q+8nbTov4+1p" crossorigin="anonymous"></script>
<script>
function refresh() {
location.reload();
}
function deleteAll() {
fetch("/user/delete-all", {
method: "DELETE",
headers: {
"Content-Type": "application/json"
}
}).then((response) => {
const status = response.status;
if (status == 200) {
refresh()
} else {
alert(status);
}
});
}
function deleteUser(id){
fetch("/user/delete-user/"+id,{
method:"DELETE",
headers:{
"Content-Type" : "application/json"
}
}).then((response)=>{
const status = response.status;
if(status===200){
refresh()
}else{
alert(status);
}
})
}
function makeUser() {
const username = document.getElementById("usernameInput").value;
const password = document.getElementById("passwordInput").value;
fetch("/user/make-user", {
method: "POST",
headers: {
"Content-Type": "application/json",
},
body: JSON.stringify({
username: username,
password: password,
}),
})
.then((response) => {
const status = response.status;
if (status == 200) {
refresh()
} else {
alert(status);
}
});
}
</script>
</body>
</html>
User 모델
▼ models/users.js
- username과 password가 포함된 스키마 userSchema를 생성하고, exports 한다.
const mongoose = require("mongoose");
const { Schema } = mongoose;

const userSchema = new Schema({
  username: { type: String, required: true },
  password: { type: String, required: true },
});

module.exports = mongoose.model("User", userSchema);
User 라우터
▼ router/userRouter.js
- 유저를 생성(post,make-user), 유저 전체 삭제 (delete-all), 유저 하나 삭제 (delete-user/:id) 에 맞게 라우터를 설정한다.
- 전체 삭제에는 deleteMany({}), 하나만 삭제에는 deleteOne({조건}) 를 사용한다.
// /make-user -> POST
// /delete-all -> DELETE
// /delete-user/:id -> DELETE BY ID

const router = require("express").Router();
const User = require("../models/users");

// POST
router.post("/make-user", async (req, res) => {
  const { username, password } = req.body;
  const user = new User({
    username: username,
    password: password,
  });

  await user
    .save()
    .then((user) => {
      res.send(user);
    })
    .catch((err) => {
      res.sendStatus(500);
    });
});

// DELETE ALL
router.delete("/delete-all", async (req, res) => {
  User.deleteMany({})
    .then(() => res.sendStatus(200))
    .catch((err) => res.sendStatus(500));
});

// DELETE BY ID
router.delete("/delete-user/:id", async (req, res) => {
  User.deleteOne({ _id: req.params.id })
    .then(() => {
      res.sendStatus(200);
    })
    .catch((err) => {
      res.sendStatus(500);
    });
});
module.exports = router;
server.js에서 라우터를 세팅한다.
▼ server.js
const userRouter = require("./router/userRouter");
...
app.use("/user", userRouter);
루트 경로의 get 요청 정의
첫 화면(루트 경로) 로딩 시의 요청을 정의한다.
▼ server.js
- User 모델의 값들을 가져와 위에서 정의한 ejs를 화면에 띄울 수 있도록 index를 렌터하고, users에 현재 users 값들을 넘겨준다.
// get 요청
app.get("/", (req, res) => {
  User.find({})
    .exec()
    .then((users) => {
      res.render("index", { users: users });
    })
    .catch((err) => {
      res.sendStatus(500);
    });
});
PORT 연결 해 서버 실행
// 서버 실행 PORT 연결
app.listen(PORT, () => {
  console.log(`Server is running on port ${PORT}`);
});
node server.js
또는
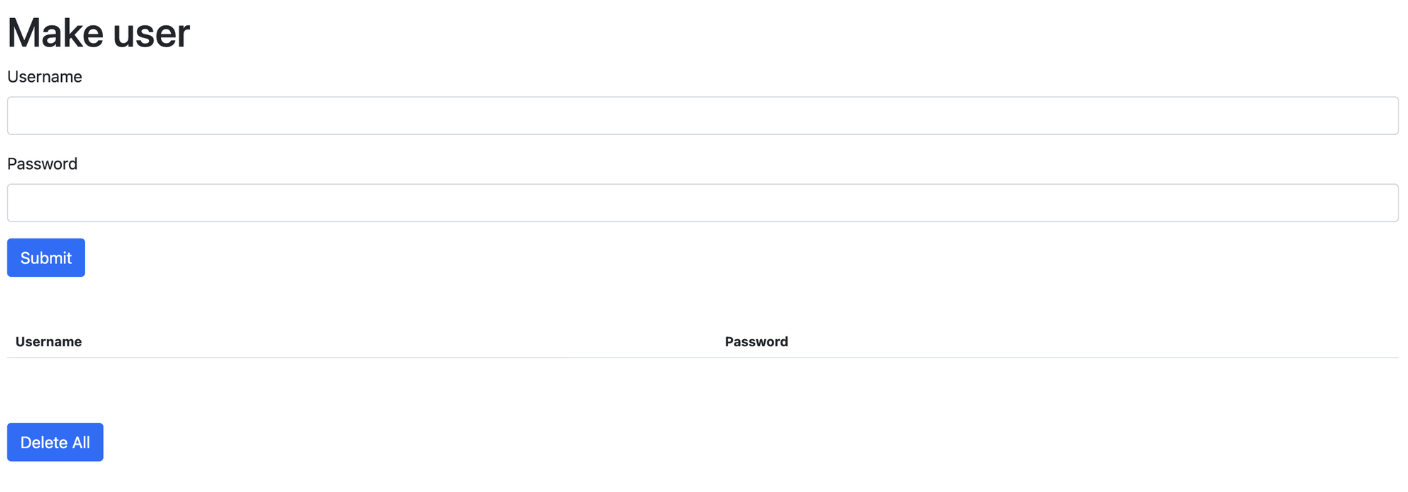
nodemon server.js결과
server 실행 후 localhost:3000 방문 시

username, password 입력 후 submit 하면 리스트 확인 가능
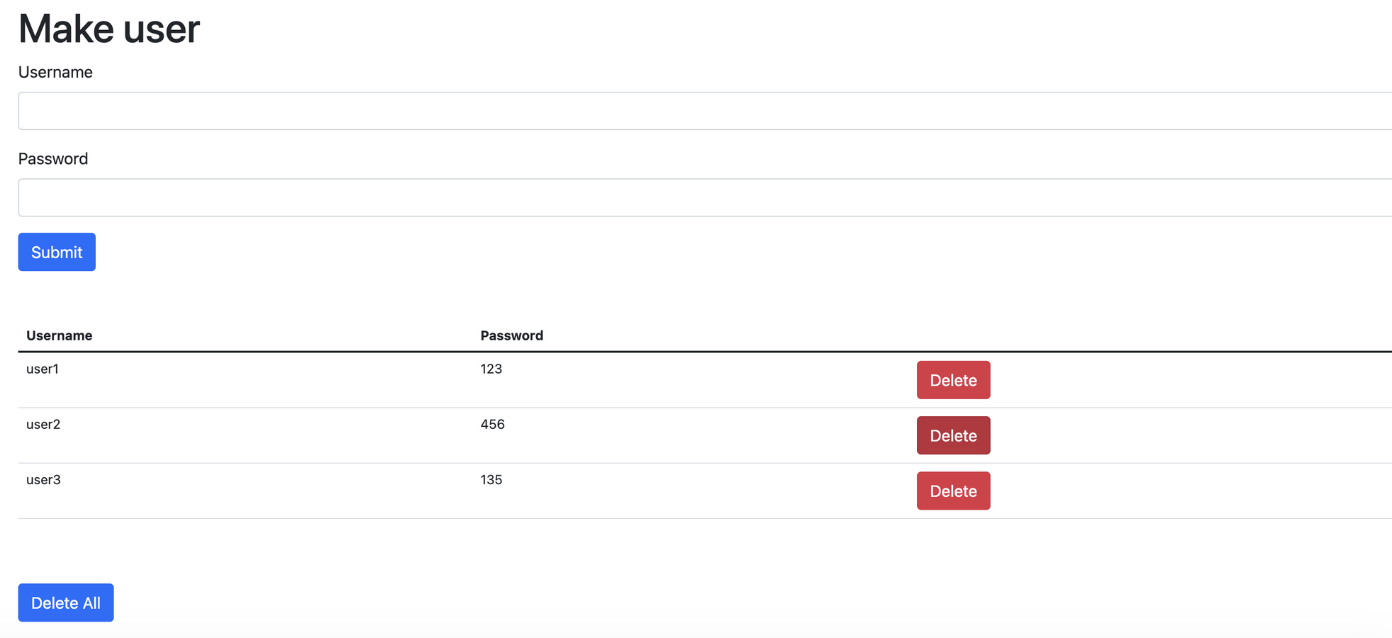
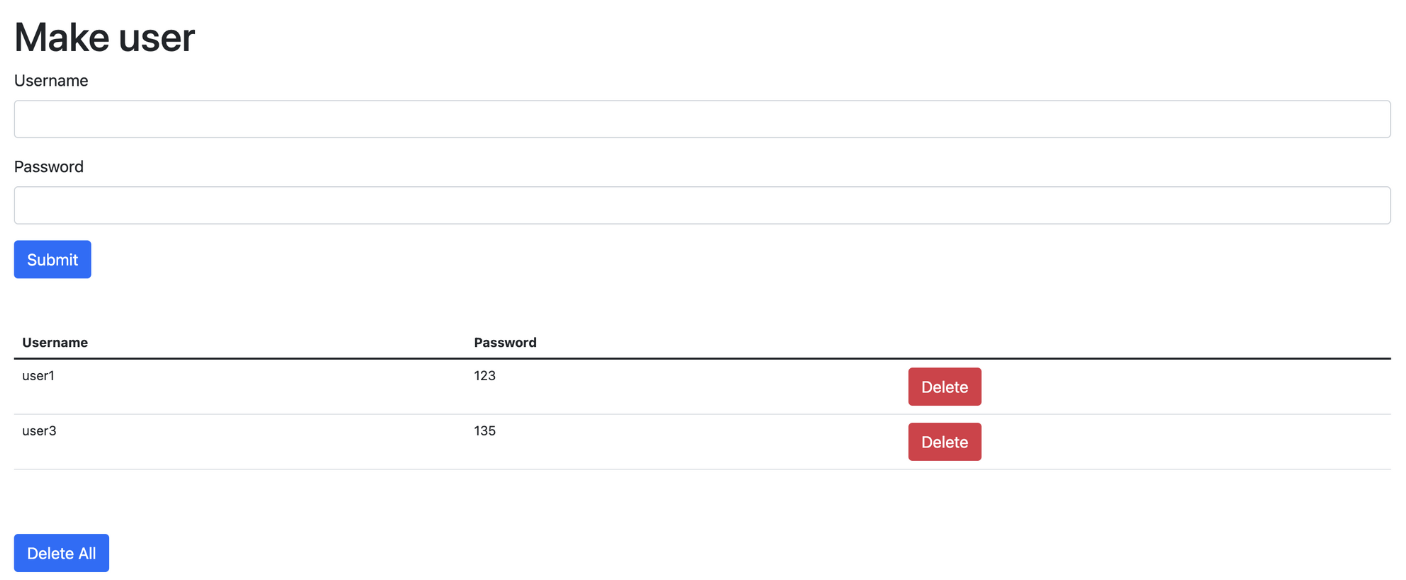
유저 별 빨간 delete 버튼 클릭 시 해당 유저만 삭제됨
delete all 버튼 클릭 시 모든 유저가 삭제되어 초기 화면과 동일하게 됨
'BACKEND > Node.js' 카테고리의 다른 글
| [ 생활코딩 - Node.js 활용하기 ] 06. pug - extends (0) | 2022.12.05 |
|---|---|
| [ 생활코딩 - Node.js 활용하기 ] 05. mySQL 버전 로그인 인증 ( local 방식 / facebook 방식) (0) | 2022.12.05 |
| [ 생활코딩 - Node.js 활용하기 ] 04. 인증을 쉽게 도와주는 PassportJS모듈 (0) | 2022.12.02 |
| [ 생활코딩 - Node.js 활용하기] 03. Security Password (1) | 2022.12.01 |
| [ 생활코딩 - Node.js 활용하기] 2. Session (0) | 2022.11.28 |